Easy Crochet Dishcloth Tutorial
Think learning to crochet is too difficult? Think again! This step-by-step tutorial will help you learn the basics while making the Easy Crochet Dishcloth for your kitchen or bath.
Skip to: Photo Tutorial | Video Tutorial | Written Pattern

I’m so glad you want to learn how to crochet! This is such a fun, creative hobby and I know you will enjoy learning as you make awesome stuff. I am so honored that I can help you on your creative journey!
What You’ll Need To Make The Easy Crochet Dishcloth
This pattern makes a single crochet dishcloth. Learn a variety of basic crochet stitches while making a dischloth perfect for all those kitchen chores! From washing dishes to wiping down counters, this dishcloth will make kitchen cleanup easy peasy!
Yarn selection is crucial to success with this pattern. Choose a 100% cotton yarn, available at most craft stores. Look for the yarn weight symbol on the ball band, typically a small yarn icon with a number in the center. You’ll want a size 3 or 4 weight yarn to use with crochet hook US size H or 5 mm.
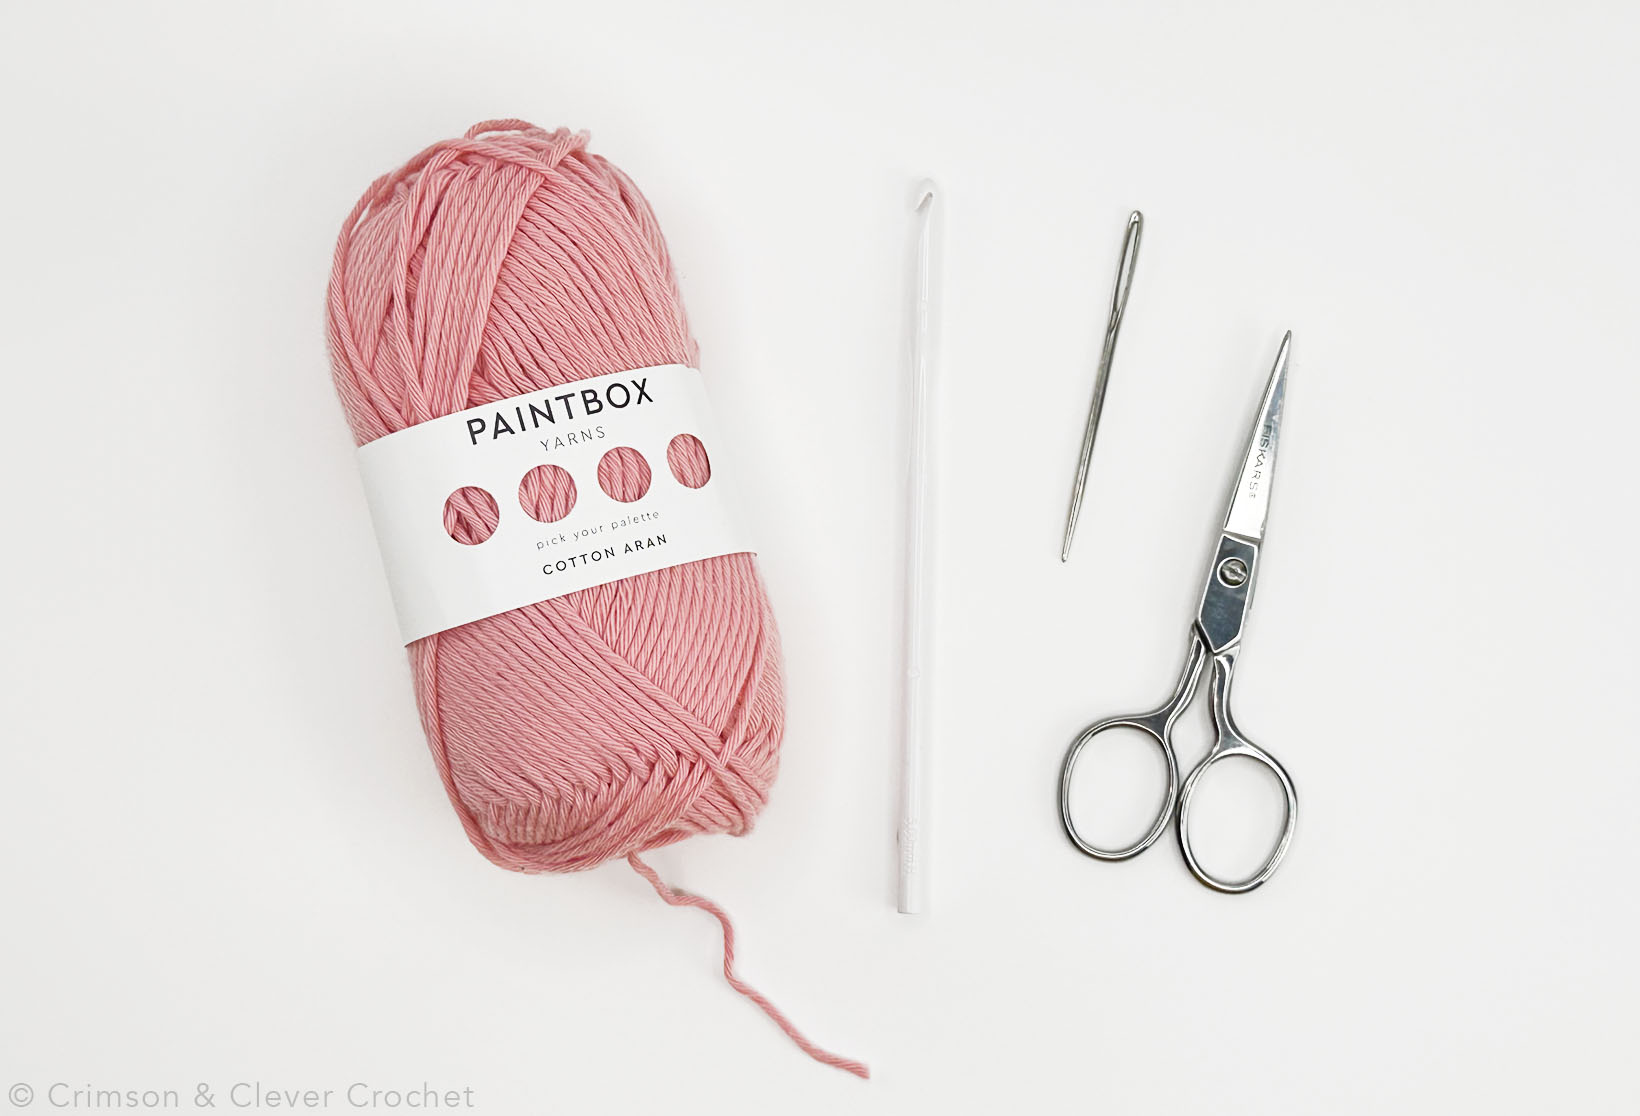
It is easy and inexpensive to learn to crochet. All you need is yarn, crochet hook H (5mm), yarn needle and scissors.
- Crochet Hook Size H (5 mm)
- 100% Cotton Yarn (Amazon or Paintbox 654 Blush Pink)
- Yarn Needle
- Scissors
- Pattern (Below Tutorial Post or Free Download)
Step-By-Step Instructions For The Easy Crochet Dishcloth
Getting Set Up
First, make a slip knot to put onto your hook.
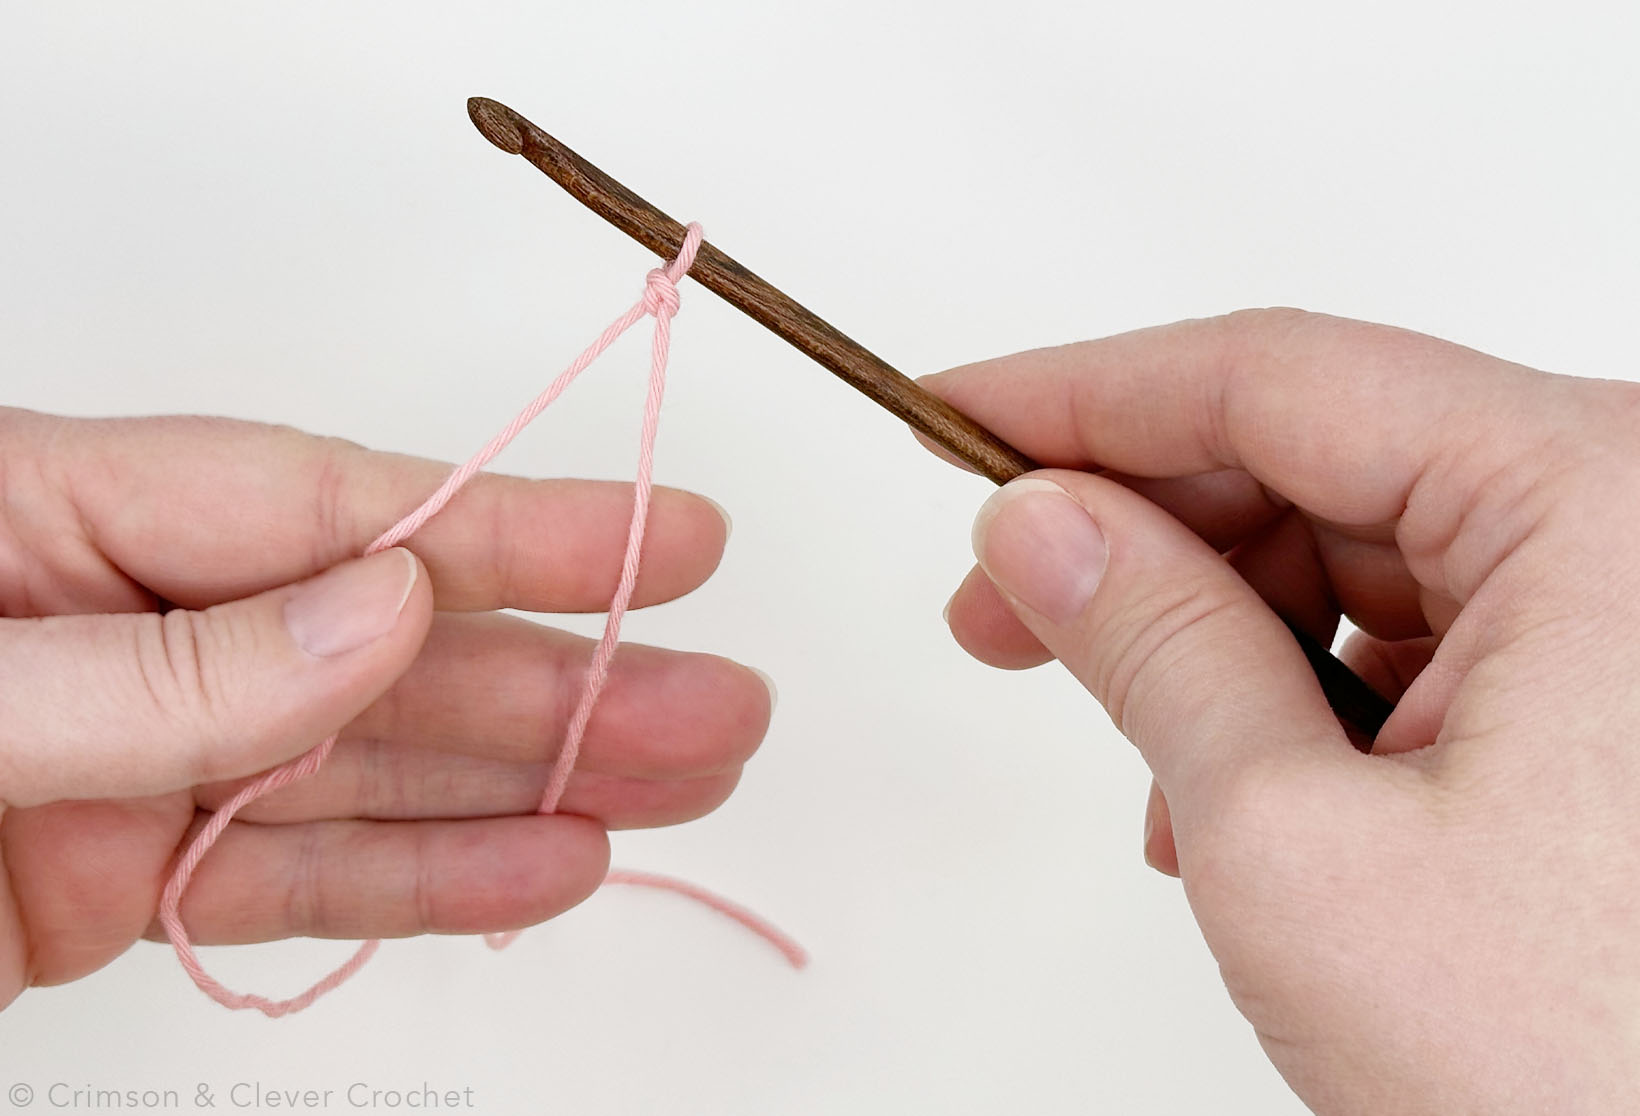
Begin by making a slip knot and placing it on your hook.
Second, place the hook in your dominant hand (I’m right handed, so all images and videos will show the right handed methods). You can hold your hook like a knife, but another popular way is to hold it like a pencil.
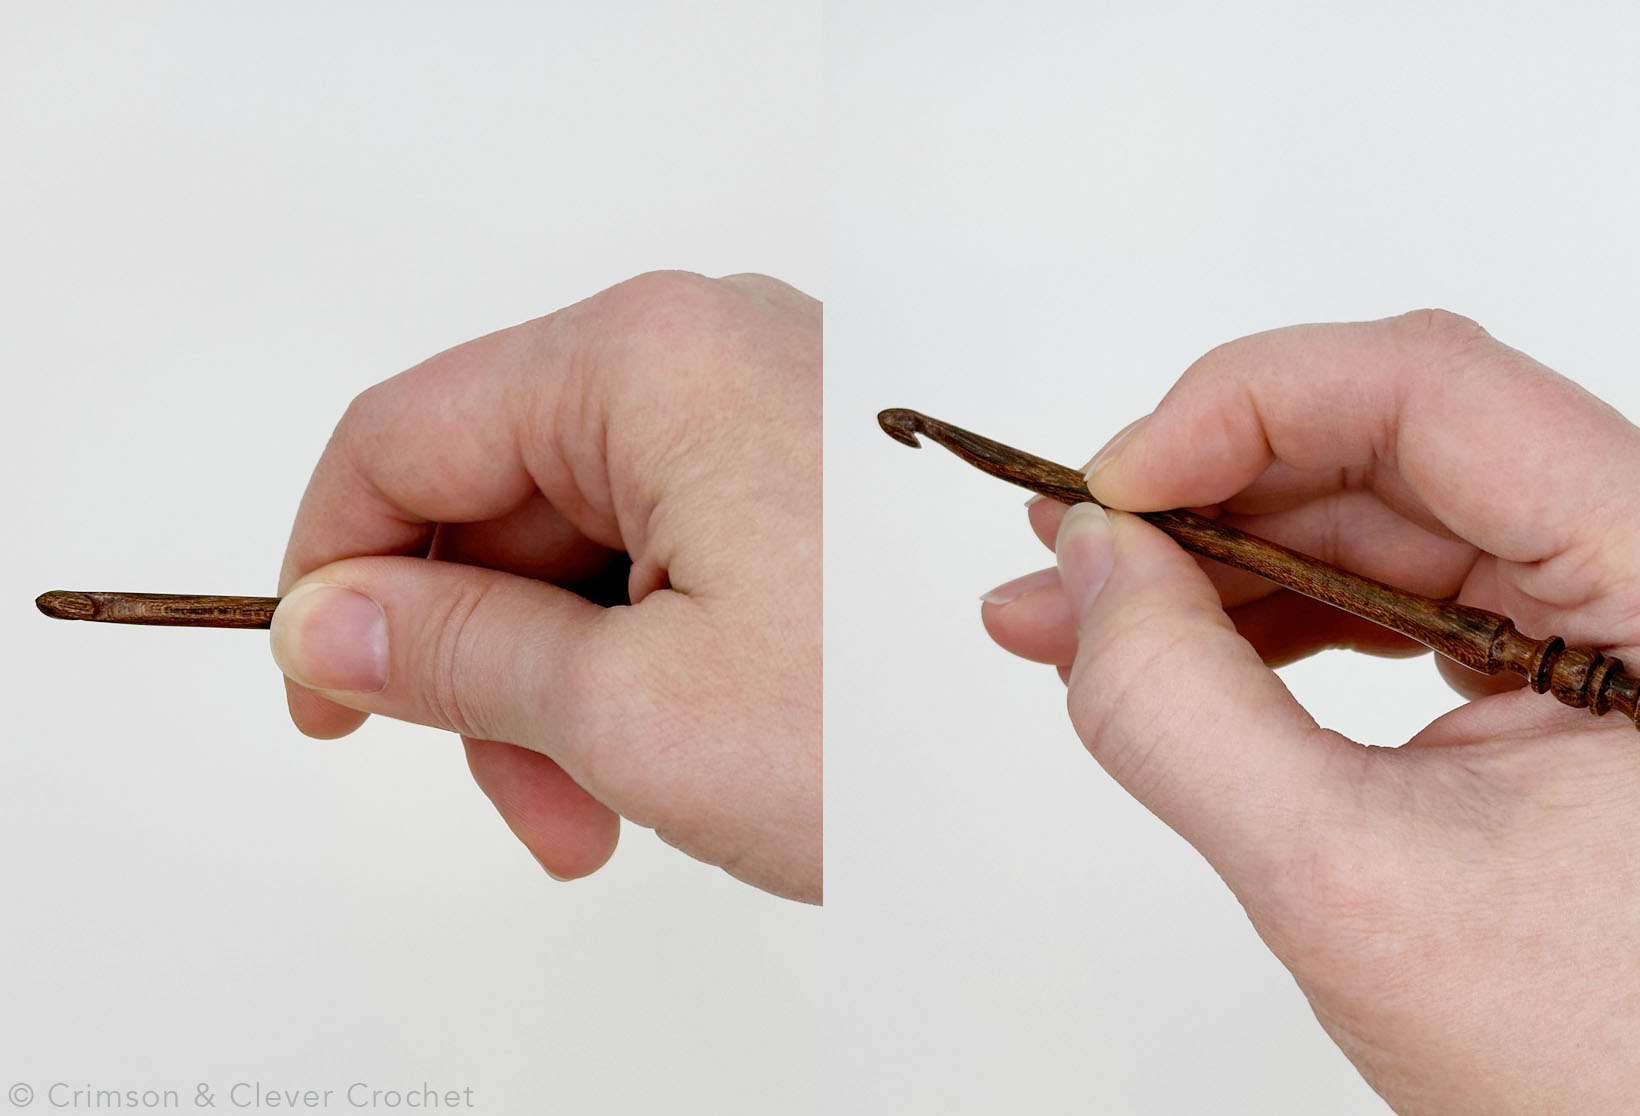
Two popular ways to hold your crochet hook: like a knife (left) or like a pencil (right). Notice the angle of the hook and index finger placement.
Now set up your non-hook hand to control the feed of the yarn to the hook. There are dozens of ways to hold your hook and yarn, but this is the most popular (and formally correct) one. Use your pinky finger to control the feed of the yarn and your index finger to control your tension as you feed the yarn to the hook.

Hold your yarn in your non-hook hand. Wind around your pinky for feed control, then up around your index finger to control tension. Finally, pinch the slipknot between your middle finger and thumb.
Chaining
Crochet is worked in two ways: in rows or in the round. This crochet dishcloth is worked in rows. Projects worked in the round will have a center point that you work from, but that’ll be covered in another Make & Learn.
All crochet pieces that are worked in rows begin with a length of chain stitches, abbreviated to ch. There are some more advanced ways to approach this step, but for now we’ll use the common, tried-and-true chain method.

Square and rectangular shaped crochet pieces are worked in rows, which begin with a length of chains.
Remember when chaining:
- This is the only time you’ll work left to right
- There will be more chains than stitches. This is for turning and keeps the chains and row 1 from pinching together.
- Never count the chains as a row!
Crochet patterns will usually have a line before the ‘Row 1, 2, 3, etc.’ instructions telling you how many chains are needed. Our pattern calls for 25 chains.
Turning The Piece
When crocheting in rows, you’ll work a row from right to left. When you reach the end, you’ll ‘turn’ the piece simply by rotating the piece 180 degrees.
Think of crochet rows (as viewed from the top) as the hand on a clock. A row is worked across from 3:00 to 9:00. Now turn the ‘hand’ so that you reset the row to 3:00. Basically putting the 9:00 end in your left hand back in your right hand, thus ‘turning’ the piece.
This will put the last chain or stitch made on the right. Now to your left, you’ll have all of the chains or stitches laid out and ready to work the next row.

A finished row will have the working loop at the far left. Rotate the piece like the hands of a clock and put the working loop in your right hand.
Row 1
The pattern for row 1 reads: Row 1: Sc in second ch from hook. Sc across. Turn. (24)
Interpretation: Single crochet (sc) in second chain (ch) from hook. Single crochet (sc) in each chain across entire chain length. When you reach the end, turn. There should be 24 single crochet stitches when this row is done.
Ok, so where’s the second chain from the hook? Every chain and crochet stitch has a top that forms a ‘v’ shape. If you look at the chain, it is easy to see. Each ‘v’ is a chain and counts as one chain.
Go to the second chain from the hook and insert your hook under the two lines that form the ‘v’ of the chain, leaving the third or ‘bottom bump’ below the hook. This can be tricky, so take your time when inserting your hook.
Now you need to do a whole row of single crochet (sc) stitches (sts). But how?
The Single Crochet (sc) Stitch

Close-up of a single crochet (sc) stitch.
With your hook inserted into the second chain from hook, pull the yarn from your left index finger over the hook. This is called a yarn over (yo). Now pull the yarn toward the stitch while rotating the hook nose down (so it won’t catch on the chain). Pull the yarn through the stitch – this is called drawing or pulling up a loop.
Now there are two loops on the crochet hook. Yarn over (yo) again and pull the yarn through both loops. That’s a completed single crochet (sc) stitch!
Continue working single crochets across the chain row. At the end, you should have 24 single crochets. Turn your piece and we’ll move on to row 2.
Row 2
Let’s decipher the pattern for Row 2: Ch 2 (does not count here and throughout). Hdc across. Turn. (24)
Interpretation: Chain 2 (also called the turn-chain or turn-ch). This chain 2 should not be counted as a stitch in this pattern. Half double crochet (hdc) in each stitch across. When you reach the end, turn. There should be 24 half double crochet stitches when this row is done.
The Half Double Crochet (hdc) Stitch
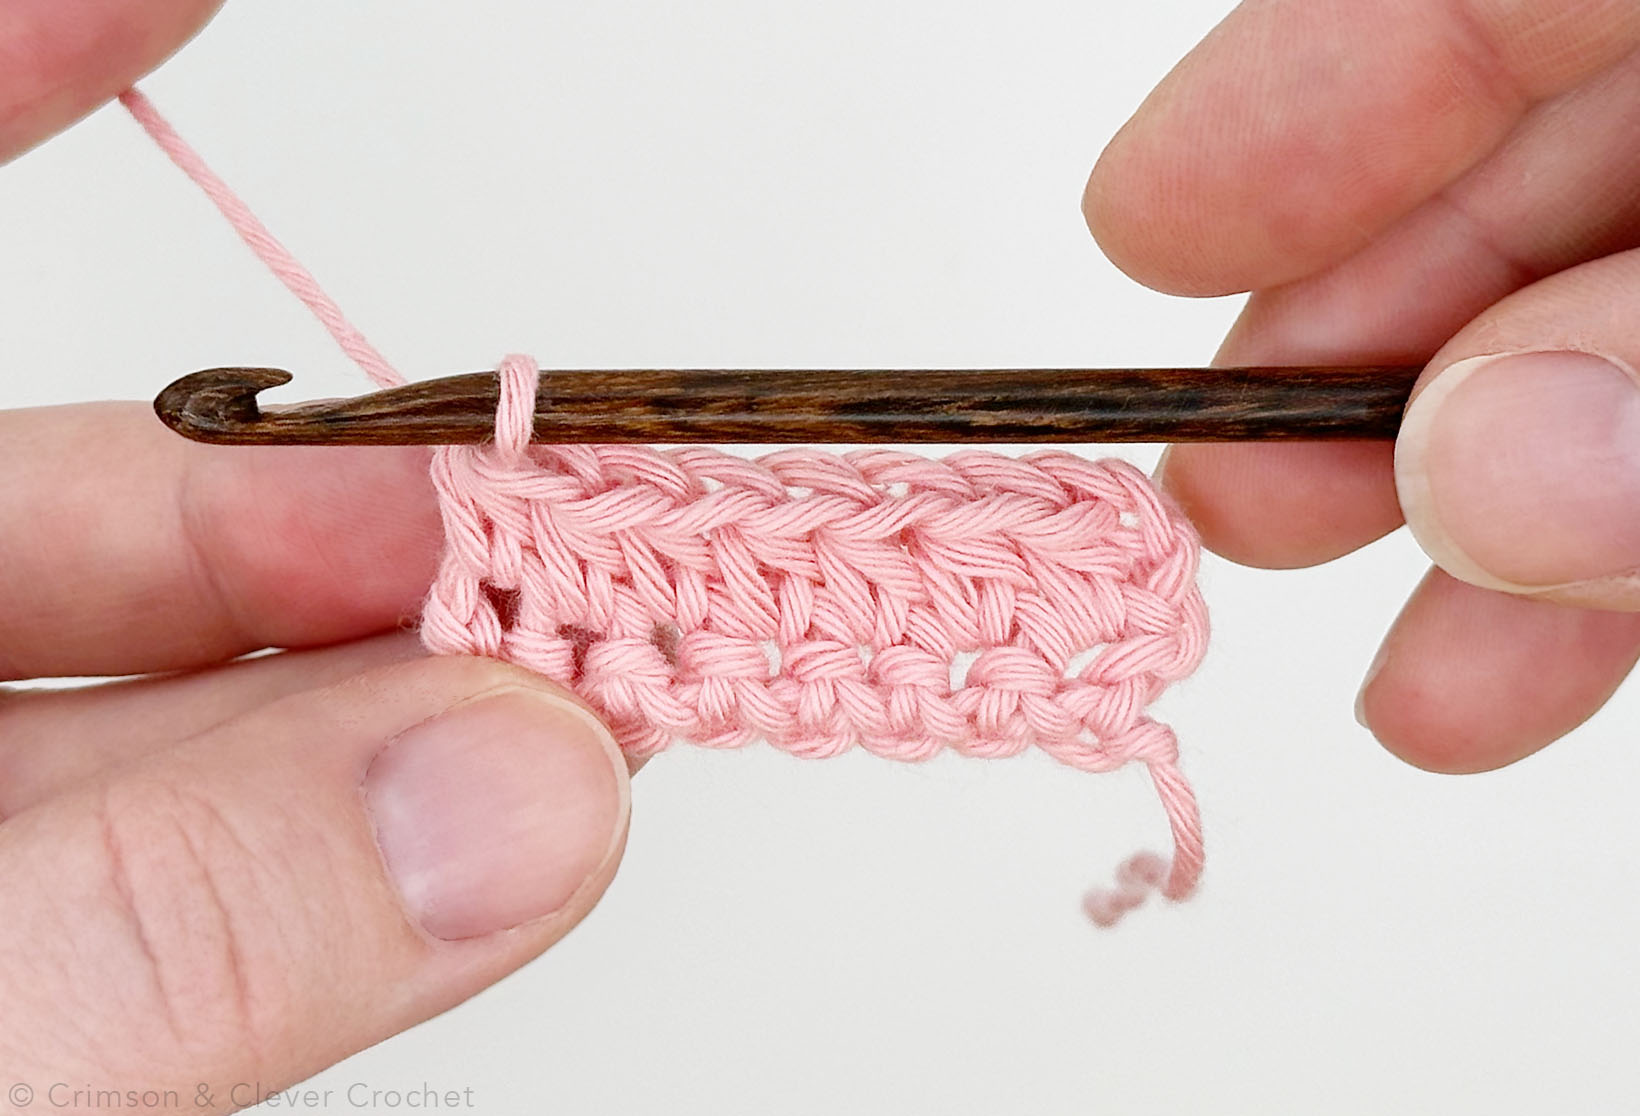
Completed row of half double crochet (hdc) stitches. The first row is worked in single crochet (sc) stitches.
Before inserting your hook, yarn over (yo). With two loops on your hook, insert your hook into the next stitch (st) of the previous row. Yarn over (yo) and draw up a loop.
Now there are 3 loops on the crochet hook. Yarn over (yo) again and pull the yarn through all 3 loops. That’s a completed half double crochet (hdc) stitch!
Continue working half double crochets across the chain row. At the end, you should have 24 half double crochets (don’t count the turn-ch!).
Row 3
Let’s decipher the pattern for Row 3: Ch 2. Dc across. Turn. (24)
Interpretation: Chain 2. Double crochet (dc) in each stitch across. When you reach the end, turn. There should be 24 double crochet stitches when this row is done.
The Double Crochet (dc) Stitch
Close-up of the first dc.
Before inserting your hook, yarn over (yo). With two loops on your hook, insert your hook into the next stitch (st) of the previous row. Yarn over (yo) and draw up a loop.
Now there are 3 loops on the crochet hook. Yarn over (yo) again and pull the yarn through the first two loops on the hook. Now there are only 2 loops on the hook. Yarn over and pull through the remaining 2 loops. Notice that the double crochet stitch is twice as high as a single crochet stitch. That’s a completed double crochet (dc) stitch!
Continue working double crochets across the chain row. At the end, you should have 24 double crochets.
Row 4 & Beyond
Believe it or not you’ve learned everything you need to finish this dishcloth! Simply repeat rows 1-3 until you’ve reach the desired length.
Crochet patterns frequently have repeats in them. There will be row repeats but sometimes even repeats within the rows to create unique and wonderful textures.
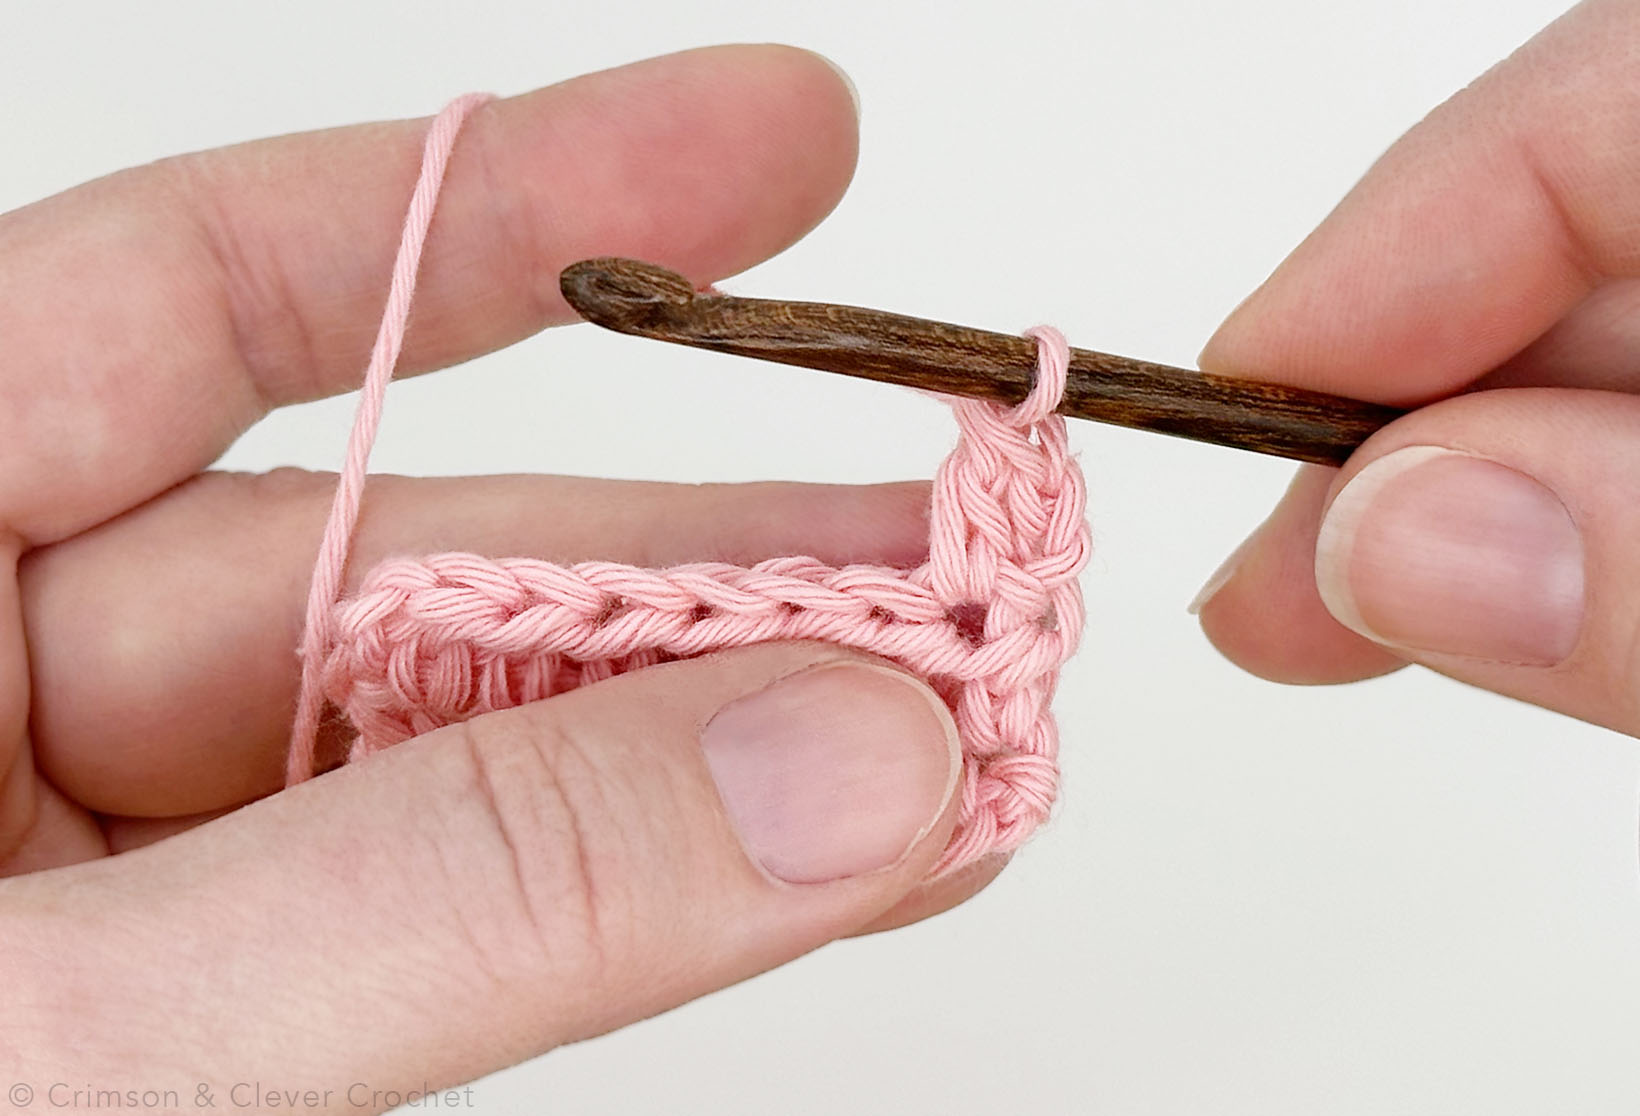
Finish Off The Easy Crochet Dishcloth
After the last row is crocheted, cut the yarn from the ball or skein leaving a 6-8” tail. Pull the tail through the last stitch, making a slip knot. Pull tight.

Close-up of the last crochet stitch finished off. Now weave in those ends and you’re done!
Now weave in the yarn tails at the beginning and end using the yarn needle. Simply thread the needle, and pull the tail through the base of the row, hiding the tail. For a super secure tail, do this several times. Clip the tail and you’re done!
Tip: Don’t crochet over the tails.
This may seem like a great cheat and it was how I hid tails in my first projects. But the sad news is that they create a lot of bulk and come loose easily. It is best to use a needle and really weave them into the rows, even splitting yarn and going back and forth.
You Did It!
I knew you could! You learned all the basics of crochet and made a great dishcloth for your kitchen or bath. Keep practicing what you learned by making this dishcloth in different colors – sets of three make great gifts! You can also vary the pattern, try making a dishcloth in all one stitch or mix up the order of the rows. The combinations are endless.
Tip: Keep a crochet journal.
Keep a record of all your projects in one place. Make sure to record all the details and the pattern you used. It might also help to include a yarn swatch and picture of your finished piece. Keeping notes on what you’d do different or the difficulty of the pattern can be helpful for later projects, too! >>DOWNLOAD OUR JOURNAL ENTRY PAGES
Video Tutorial


Easy Crochet Dishcloth Tutorial
Difficulty: Basic
Make Time: 30 minutes
Finished Size: 10" x 10"
Description
A beautiful cotton washcloth. Stitch variation make this the perfect companion in the kitchen or bath.