Slip Knot
This post may contain affiliate links. Read my full disclosure policy.
This website does not provide medical advice. Read my full disclaimer here.
Slip Knot In-Depth Photo Tutorial
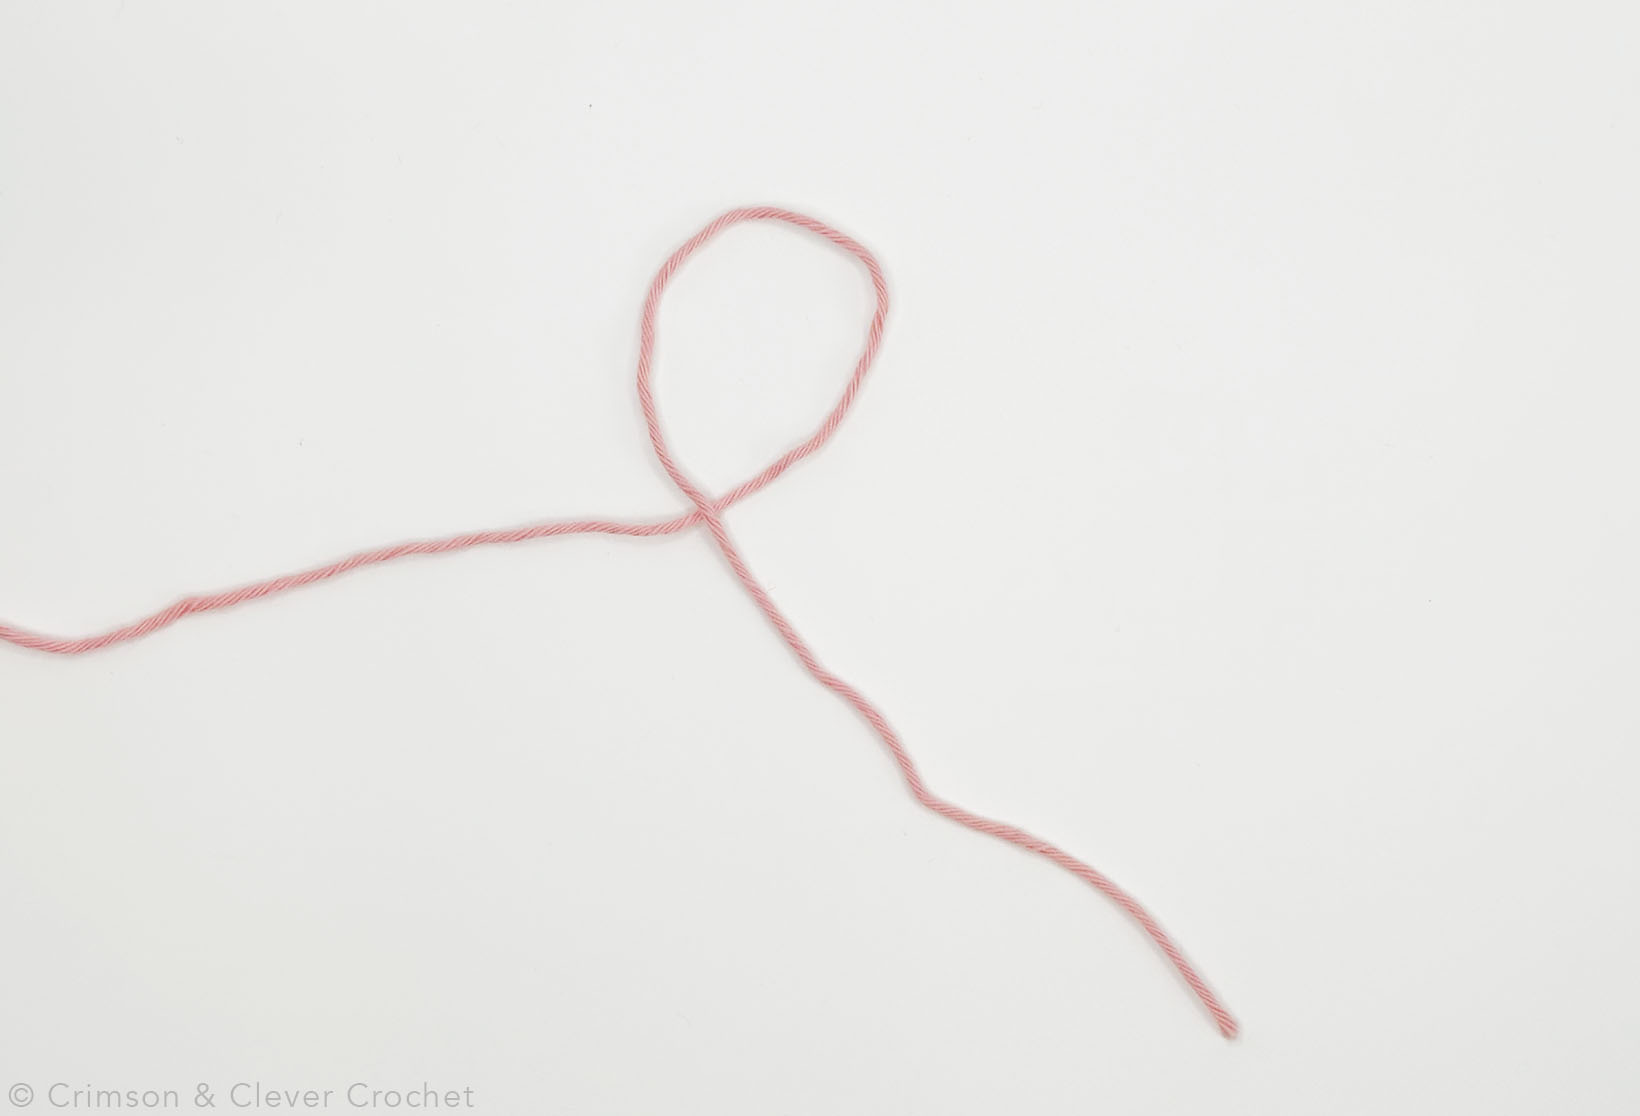
1. Begin by finding the tail end of the yarn in the center of the yarn skein. Loop the tail over on itself to make the first loop.
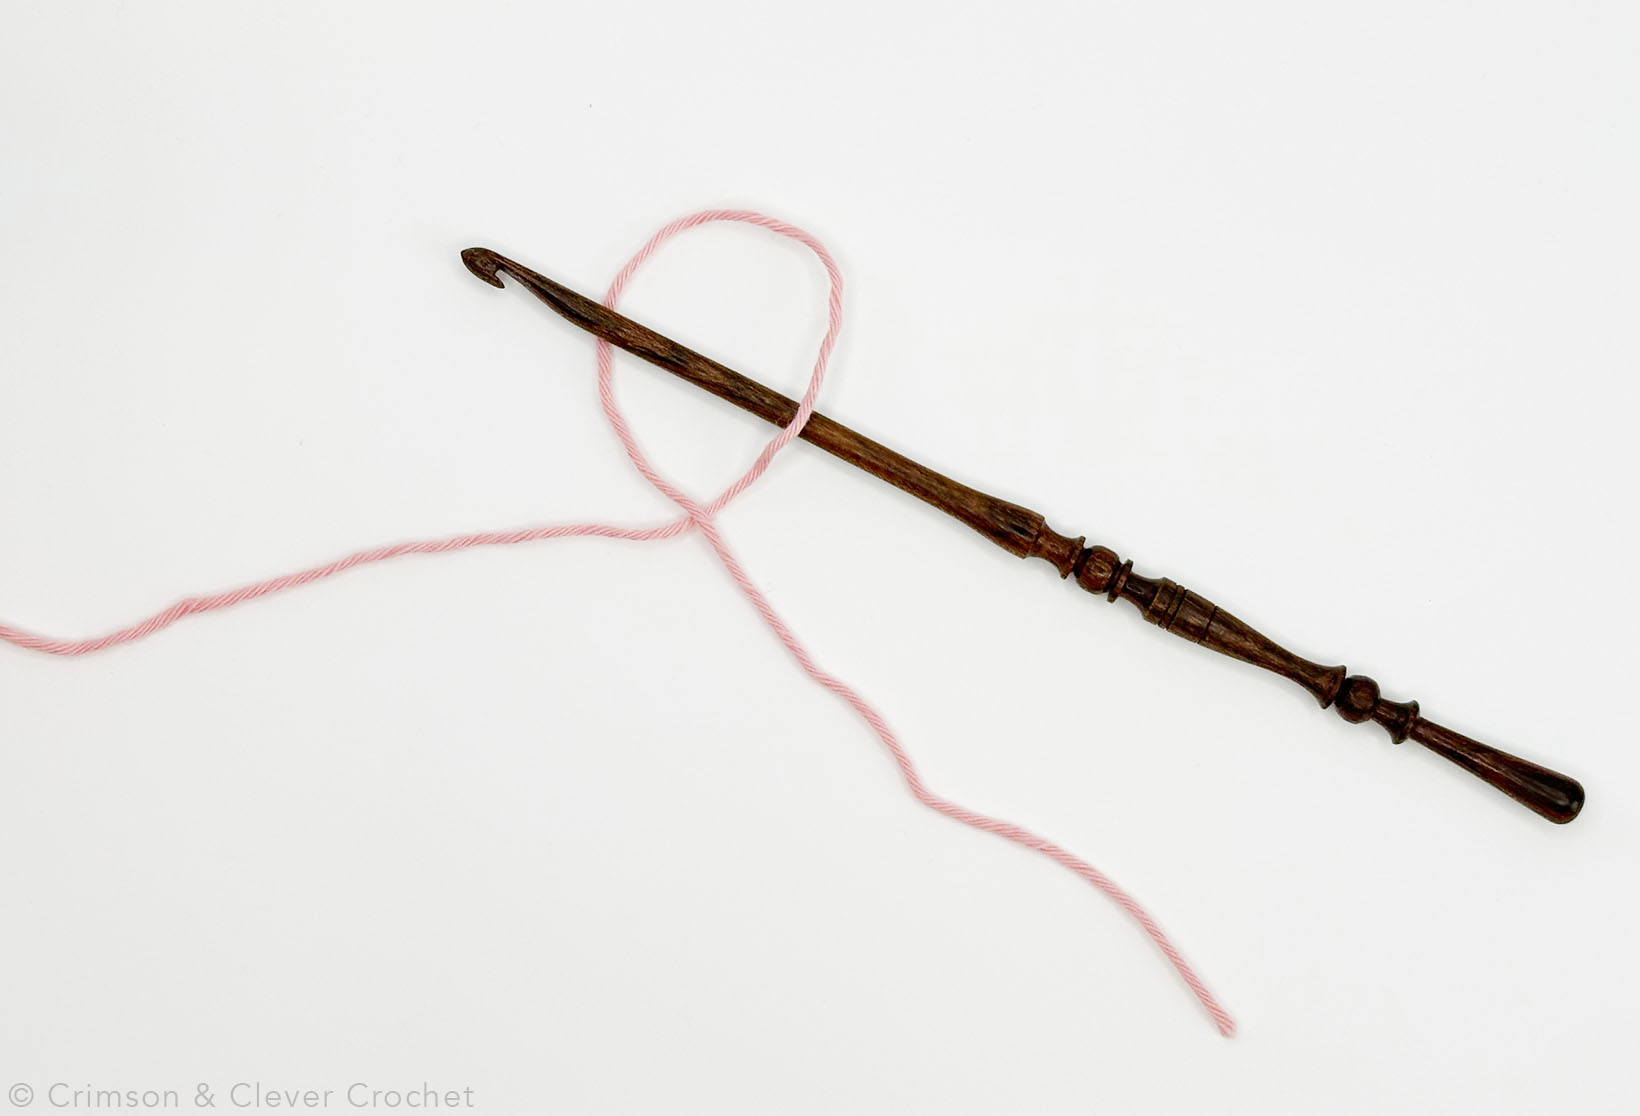
2. Place your hook in the loop as pictured: under the right side of the first loop and over the left side.

3. Grab the yarn with the hook. This should be the end of the yarn coming from the skein or ball. This we’ll call the ‘working end’.
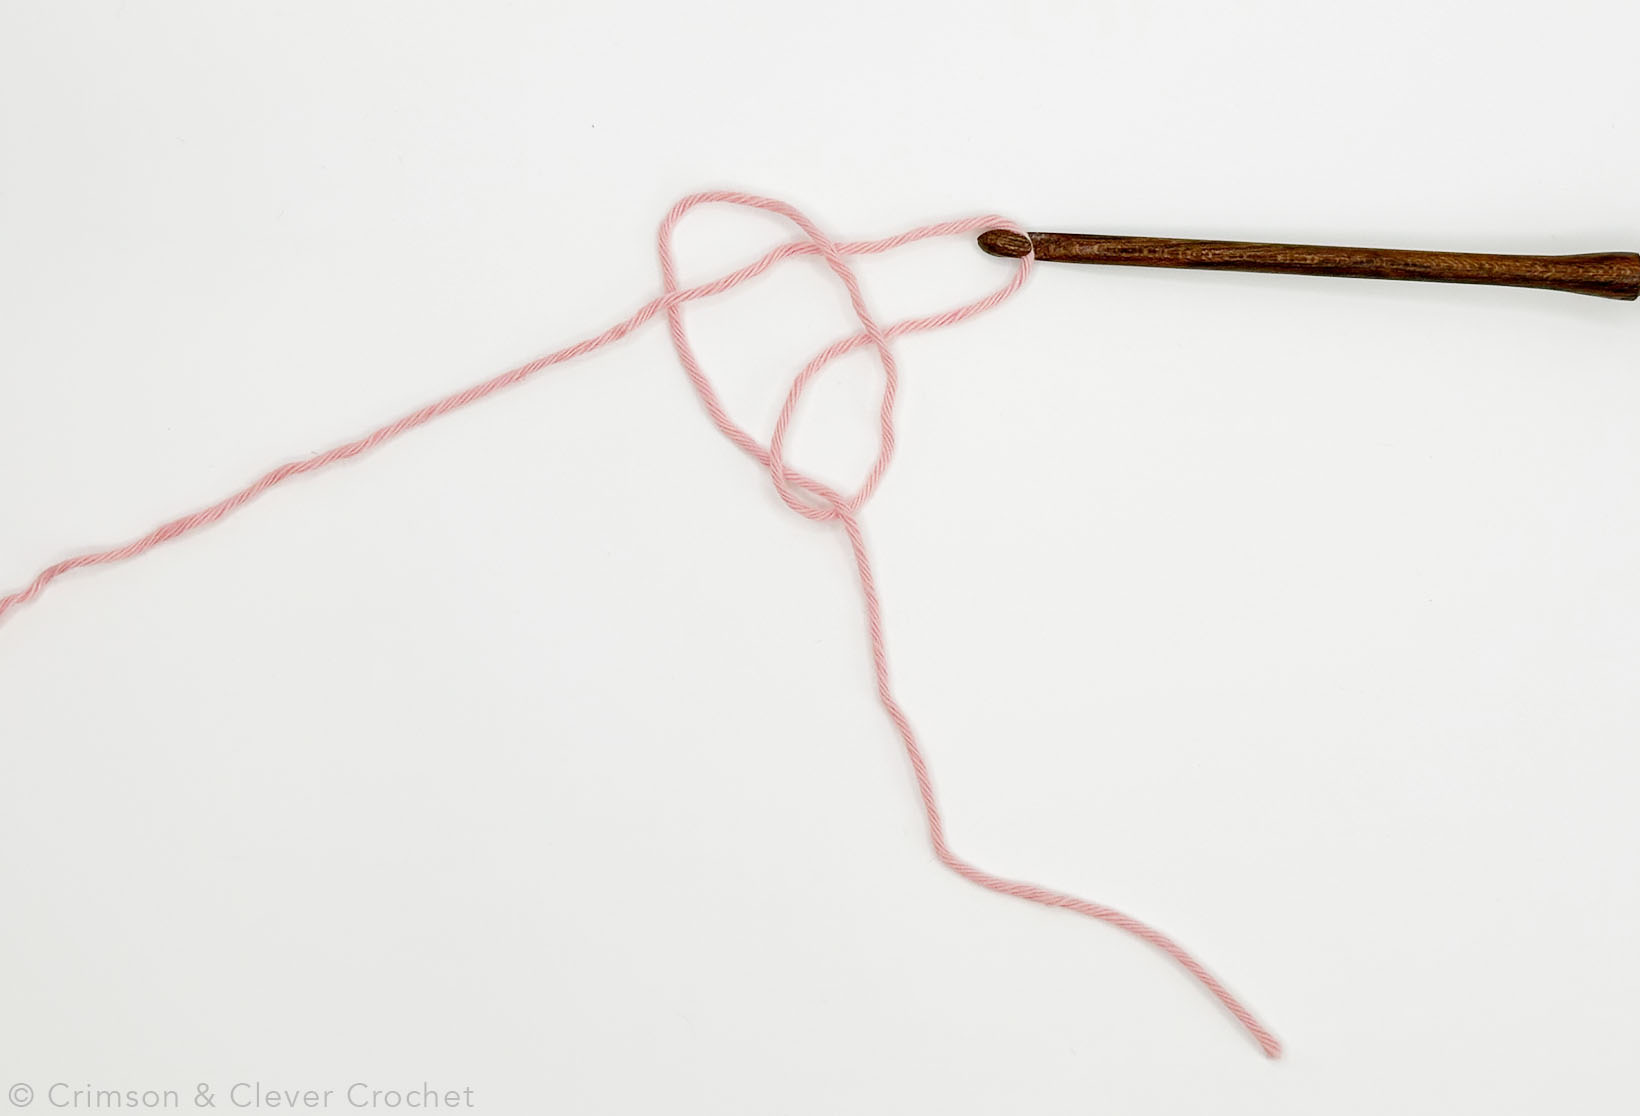
4. Now pull the working end through the first loop. You’ll see a second loop start to take shape. Keep this loop on your hook!

5. Begin tightening the slip knot (this is the first loop tightening around the second loop), but don’t get too tight too fast.

6. Gently pull on the working end of the yarn to move the knot up to the shaft of the crochet hook. The slip knot should be snug, but not tight so it can still slide easily.
You’ve made your first slip knot!